
STEP 1: Click on HR Apps on your RemoteTeam dashboard.
STEP 2: Click on Payments and click the Enable button for Invoice App.
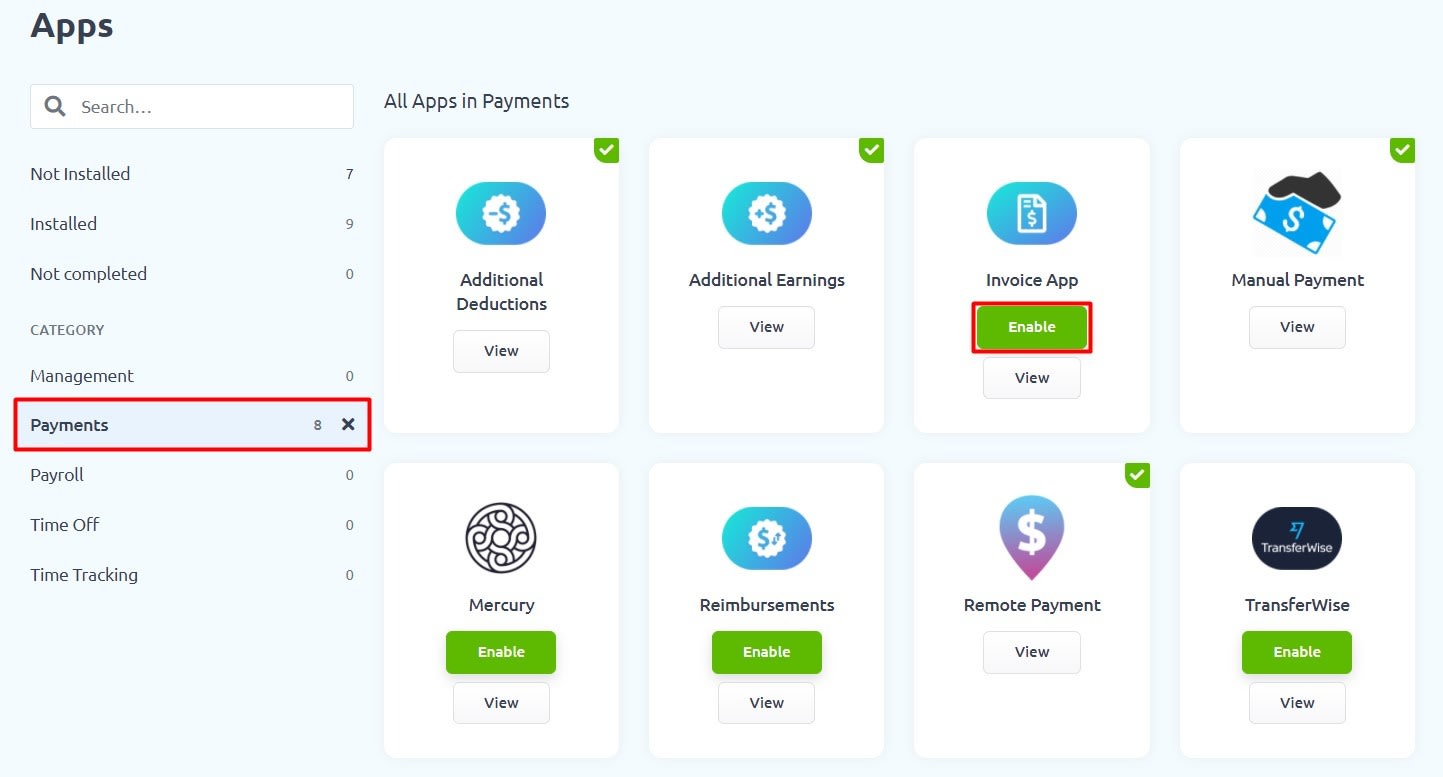
Your invoice app will be successfully installed.
How to Add Clients for Invoice Payments?
A guide on how to add clients for Invoice payments.
There are two ways to add a Client(s) to RemoteTeam – via the New Client button when creating an Invoice and through the Clients menu itself.
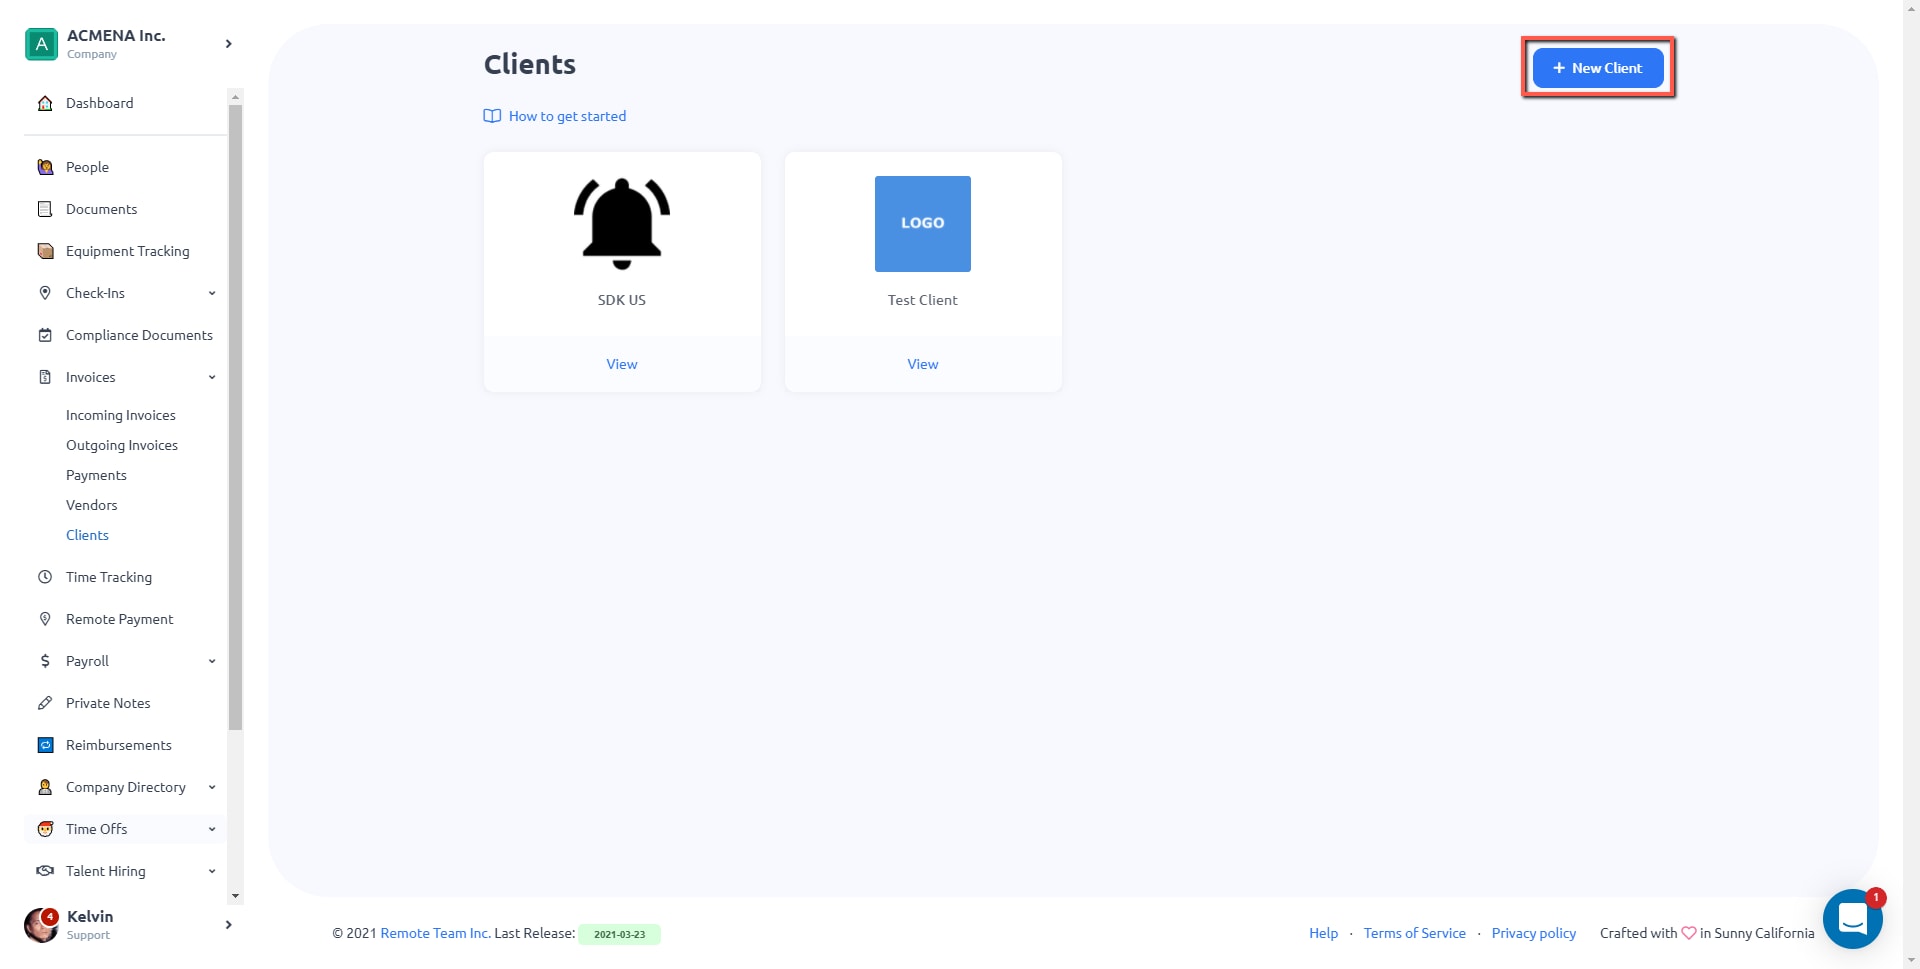
STEP 1: On your RemoteTeam dashboard, click on Invoices > Clients.

STEP 2: Click the New Client button.
STEP 3: If the Client that you are trying to add is an existing company in RemoteTeam, you need to add them using their RemoteTeam ID. If it’s a new Client, do it through the Invite New Client part.
** For Clients to get their RemoteTeam ID, they need to go to Settings on their dashboard. **

STEP 4: Fill in the New Client details – Business Name, Business Country, Contact Email and Contact Full Name. Then click the Invite to RemoteTeam button. Review the details and click the Confirm button to continue.

STEP 5: Set a bank account where you would receive the payments from your Clients. Click the Set a bank Account button and choose from your available bank accounts or add a new one through New Bank Account.


Aside from paying Contractors and Vendors, you can now receive payments from your Clients through Invoices.
STEP 1: On your RemoteTeam dashboard, click on Invoices > Outgoing Invoices.
STEP 2: Click the New Outgoing Invoice button.

STEP 3: Select the Client that you will be sending the Invoice to from the dropdown and click Create button. You also have an option to add a new client by clicking the New Client button. Steps on adding a new client are discussed on this article <insert link here>.

STEP 4: Fill in the details of the Invoice – Due Date, Notes , Invoice Currency, File (if you need to attach any file or document), Description (details of what you are paying for and amount). You can add multiple items by clicking the Add Item button.
Once the details have been added, click Save as Draft button (to save for later submission) or Save and Submit button to finish it.

Your client will receive an email as soon as you submitted the Invoice. You also have an option to print the Invoice by clicking the Print Invoice button.

There are two ways to add a Vendor(s) to RemoteTeam – via the New Vendor button when creating an Invoice and through the Vendors menu itself.
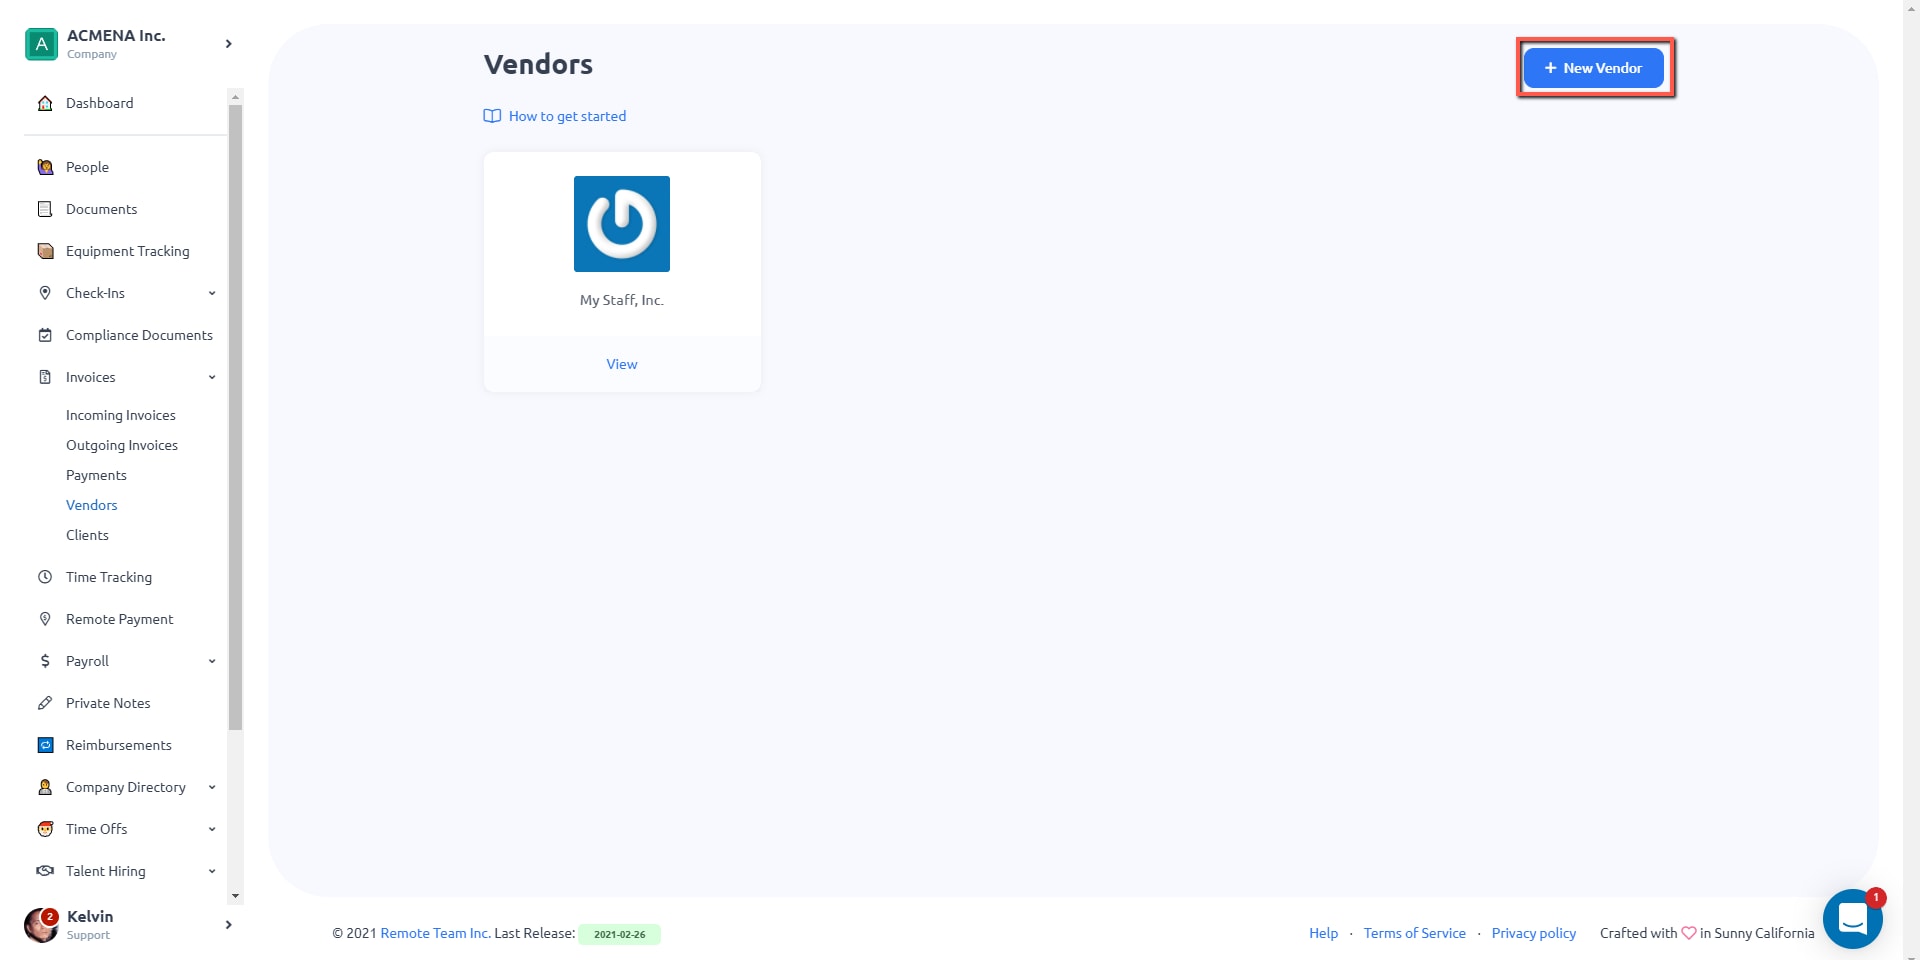
STEP 1: Click on Invoices > Vendors.
STEP 2: Click the New Vendor button.
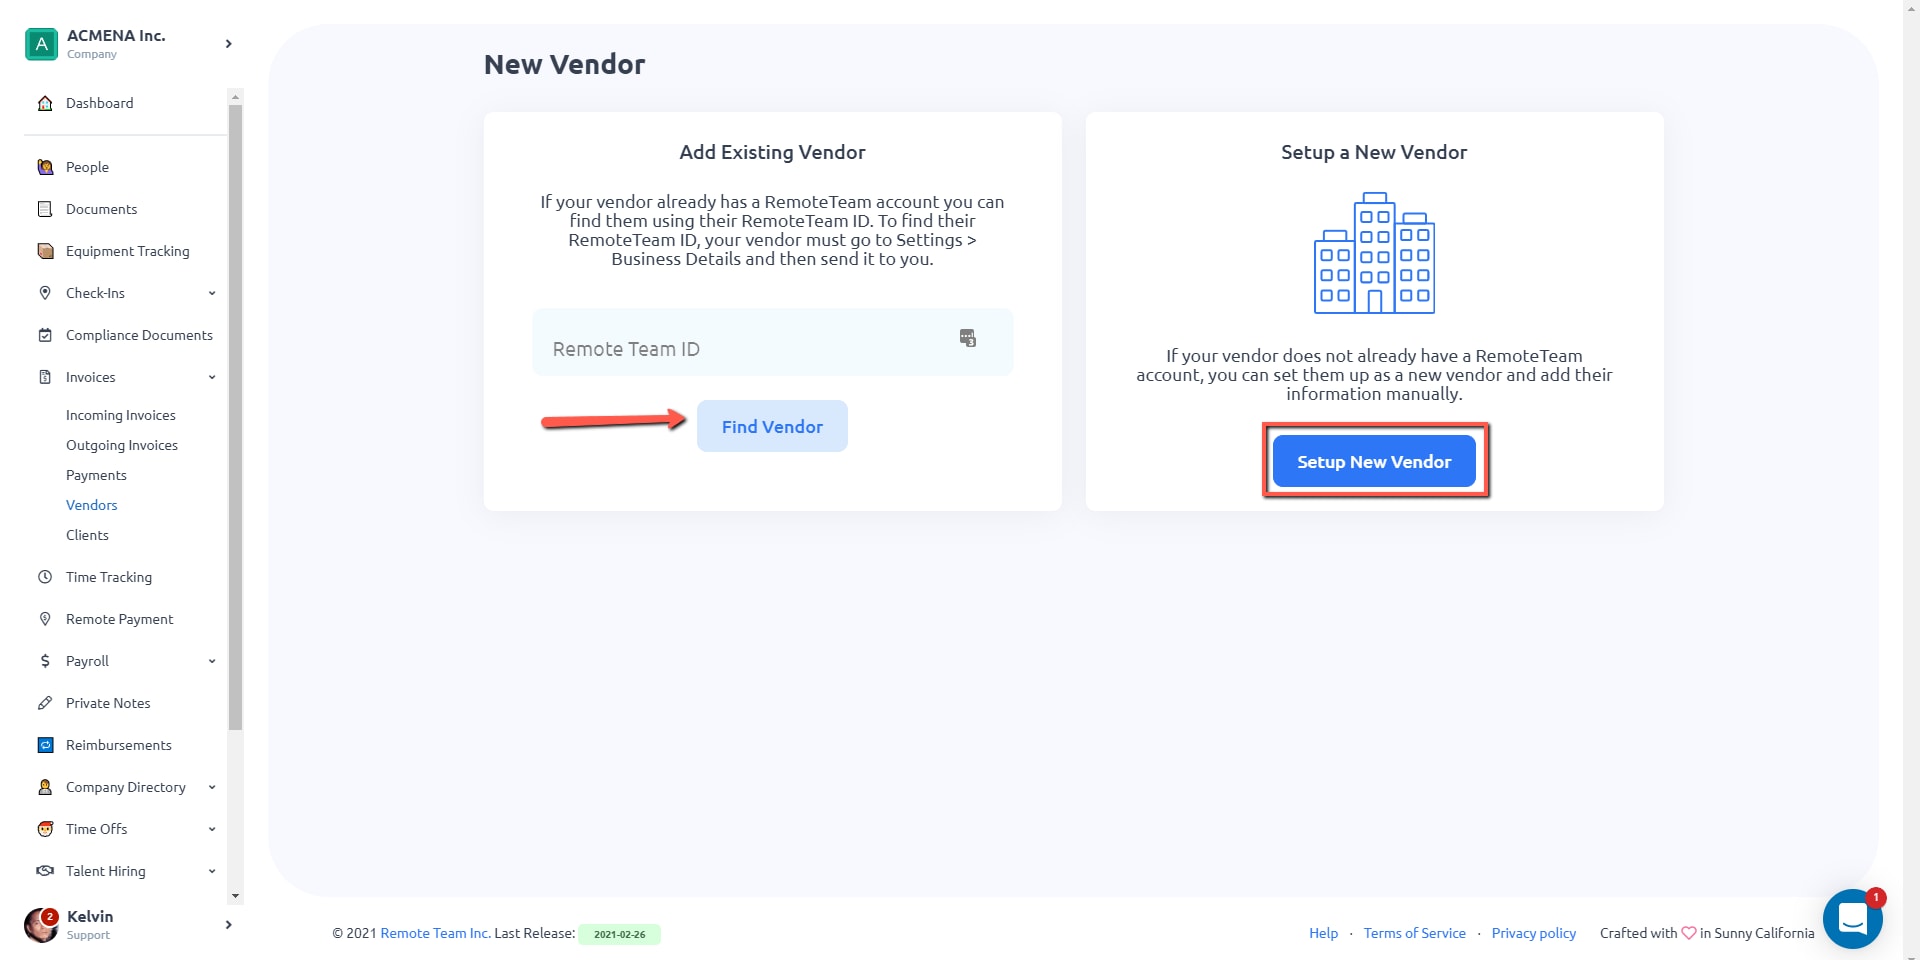
STEP 3: If the Vendor that you are trying to add is an existing company in RemoteTeam, you need to add them using their RemoteTeam ID. If it’s a new Vendor, click the Setup New Vendor button.
STEP 4: Fill in the Vendor’s business information – Business Name, Business Country, Contact Email, and Contact Full Name. When adding a Vendor that doesn’t have a RemoteTeam account, you have the option to invite them to join RemoteTeam. Just check the Invite to RemoteTeam checkbox. Then click the Next button.

STEP 5: Fill in the Vendor Address and Bank account information. If you don’t have the information, you have the option to skip both steps and let the Vendor set them up later.

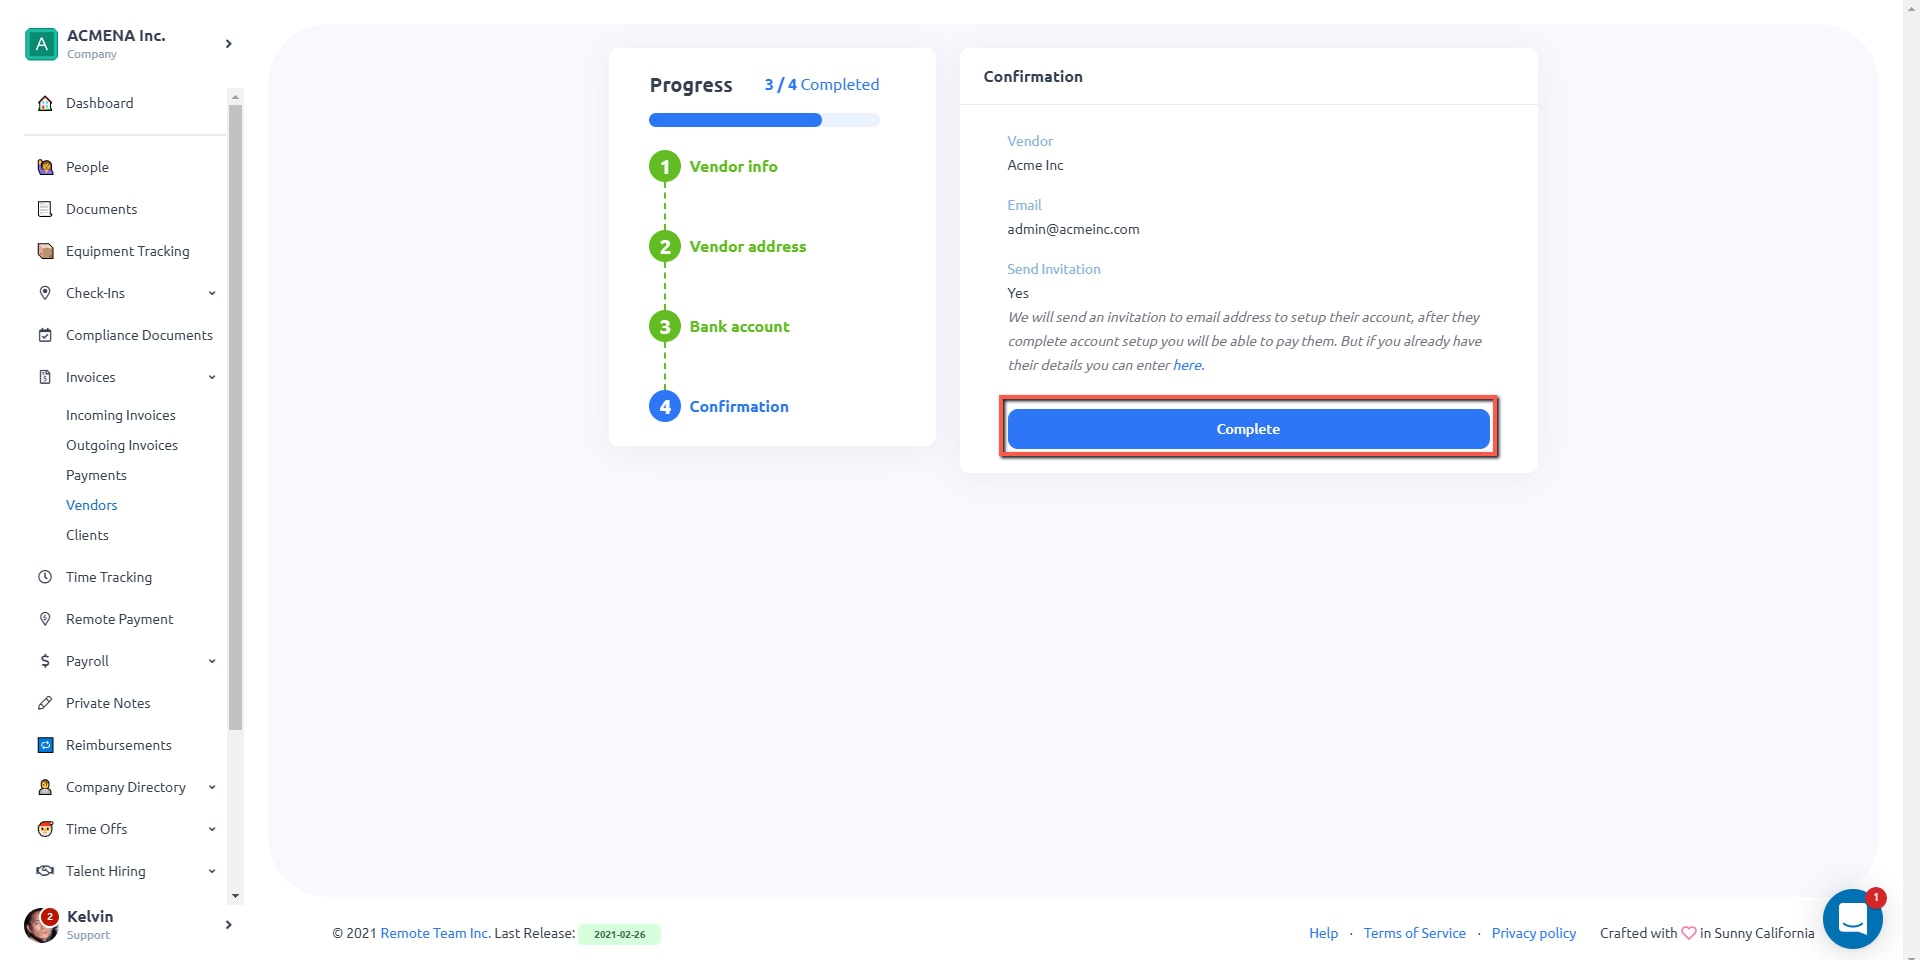
STEP 6: Click the Complete button on the Confirmation page to complete adding the Vendor. An email will be sent to the vendor contact email regarding the invitation.
With the recent updates on the Invoices function, aside from paying Contractors, you can now pay Vendors as well. So how do we go about it?
STEP 1: On your RemoteTeam dashboard, click on Invoices.

STEP 2: Click on New Incoming Invoice button.

STEP 3: Select Vendors and click the Next button.

STEP 4: Select the Vendor that you will be paying from the dropdown and click Create button. You also have an option to add a new vendor by clicking the New Vendor button. Steps on adding a new vendor are discussed on this article How to Add Vendors for Invoice Payments.

STEP 5: Fill in the details of the Invoice – Due Date, Notes , Invoice Currency, File (if you need to attach any file or document), Description (details of what you are paying for and amount). You can add multiple items by clicking the Add Item button.
Once the details have been added, click Save as Draft button (to save for later submission) or Save and Submit button to finish it.

STEP 6: You can now pay the Invoice by clicking the Pay button.

Here is a detailed article about How to Pay Invoices?
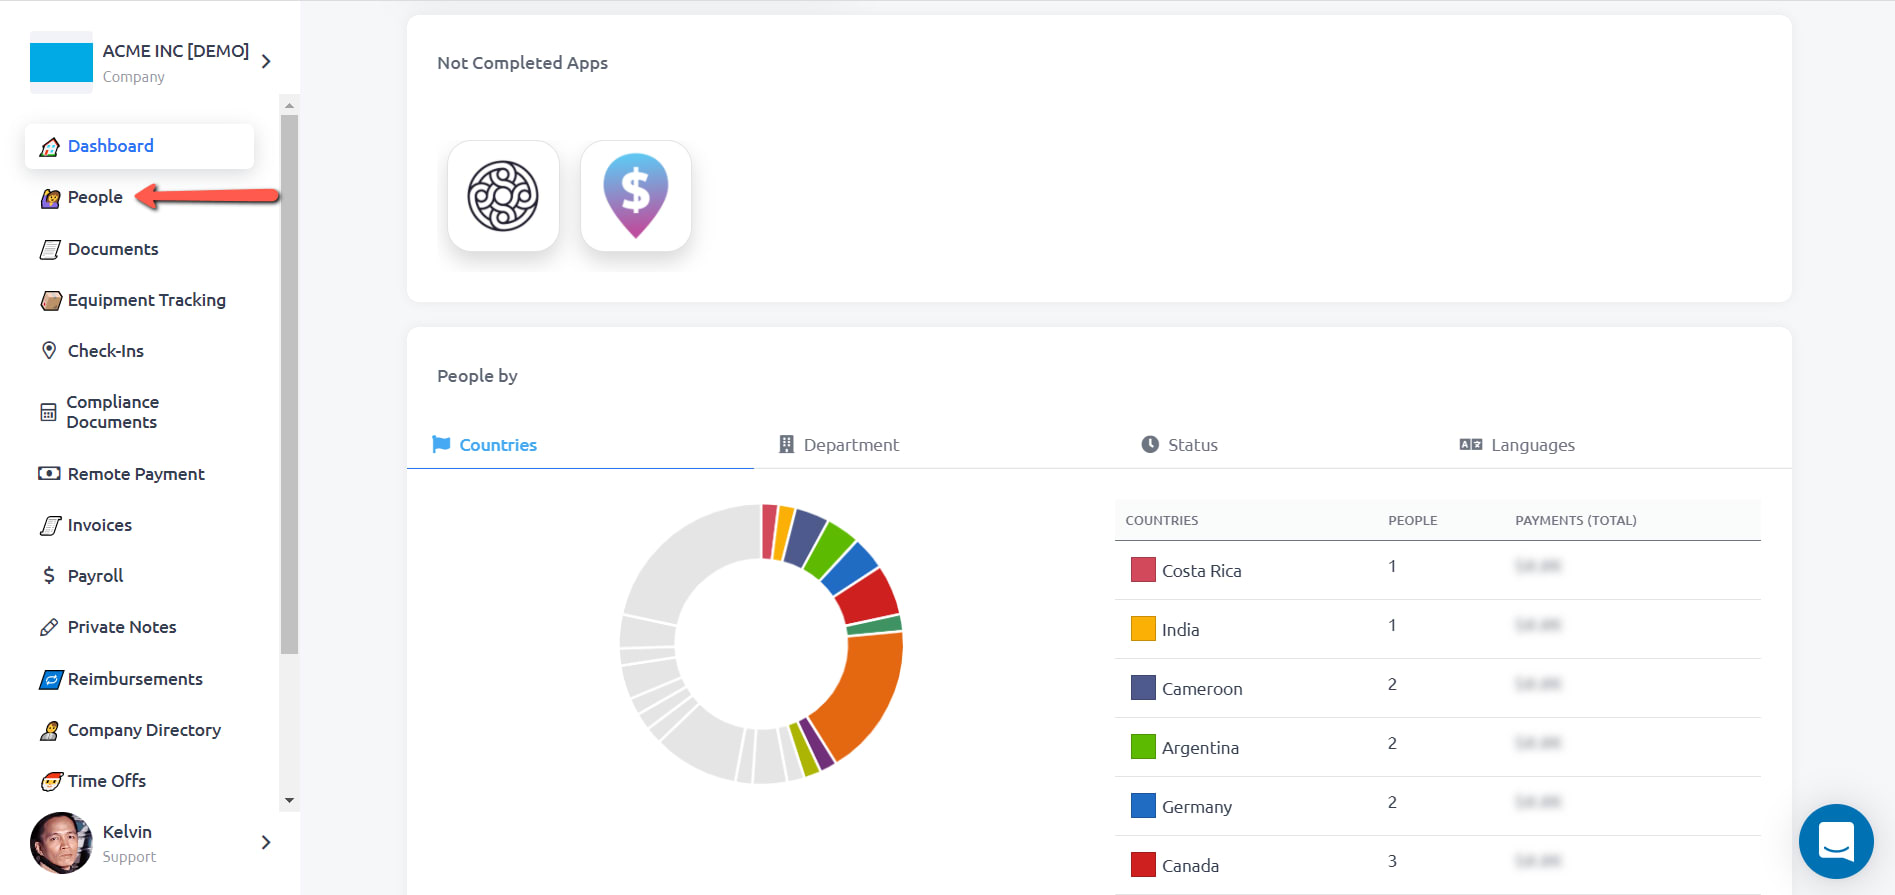
STEP 1: On your Remote Team dashboard, please go to People.
STEP 2: Click the Details button of the team member that you need to create an Invoice for.

STEP 3: Click on Invoices and then on the New button to create a new invoice.

STEP 4: Fill in the information needed – Due Date, Notes, Description, Quantity and Price.

STEP 5: Click on the Save and Request button to submit the Invoice. You could also Save it and submit it at a later time.

STEP 6: You can now Pay the Invoice by clicking the Pay button.

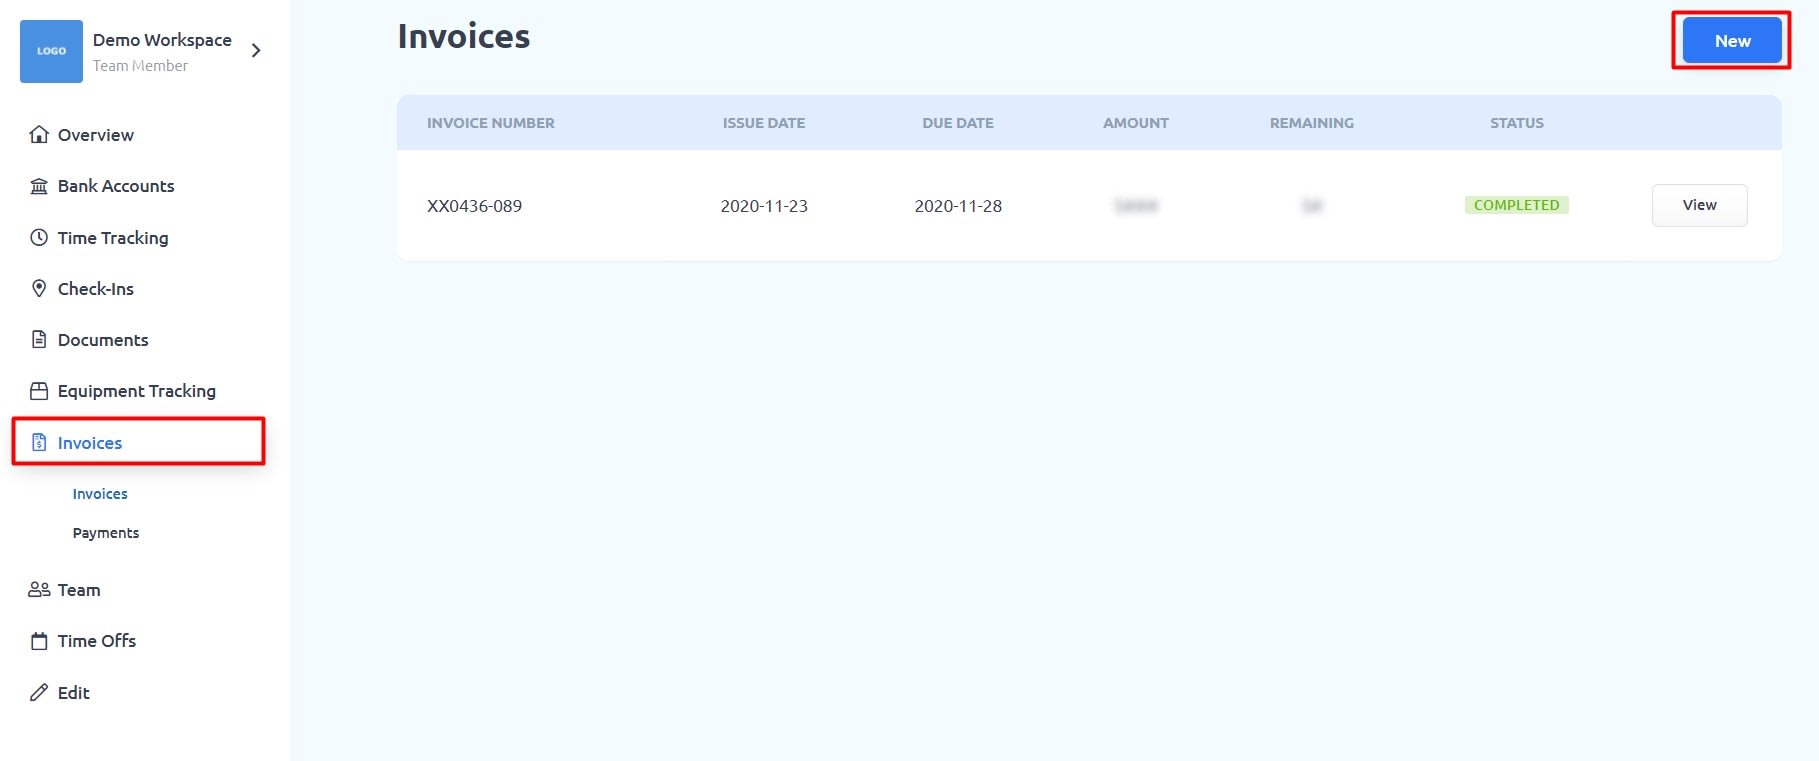
Step 1: Go to the Invoices page on your RemoteTeam’s dashboard and click the New button for creating a new invoice.
Step 2: Select the invoice issue date (Issued on), the date for the payment you will receive (Due), the currency you prefer on your invoice. If you wish, you can also add a note and then, to the Item section add your project/product with its quantity and unit price.
Then, you can click the Save button to save the invoice you created to make a payment request later or click the Save and Request button to save and make a request at the same time.

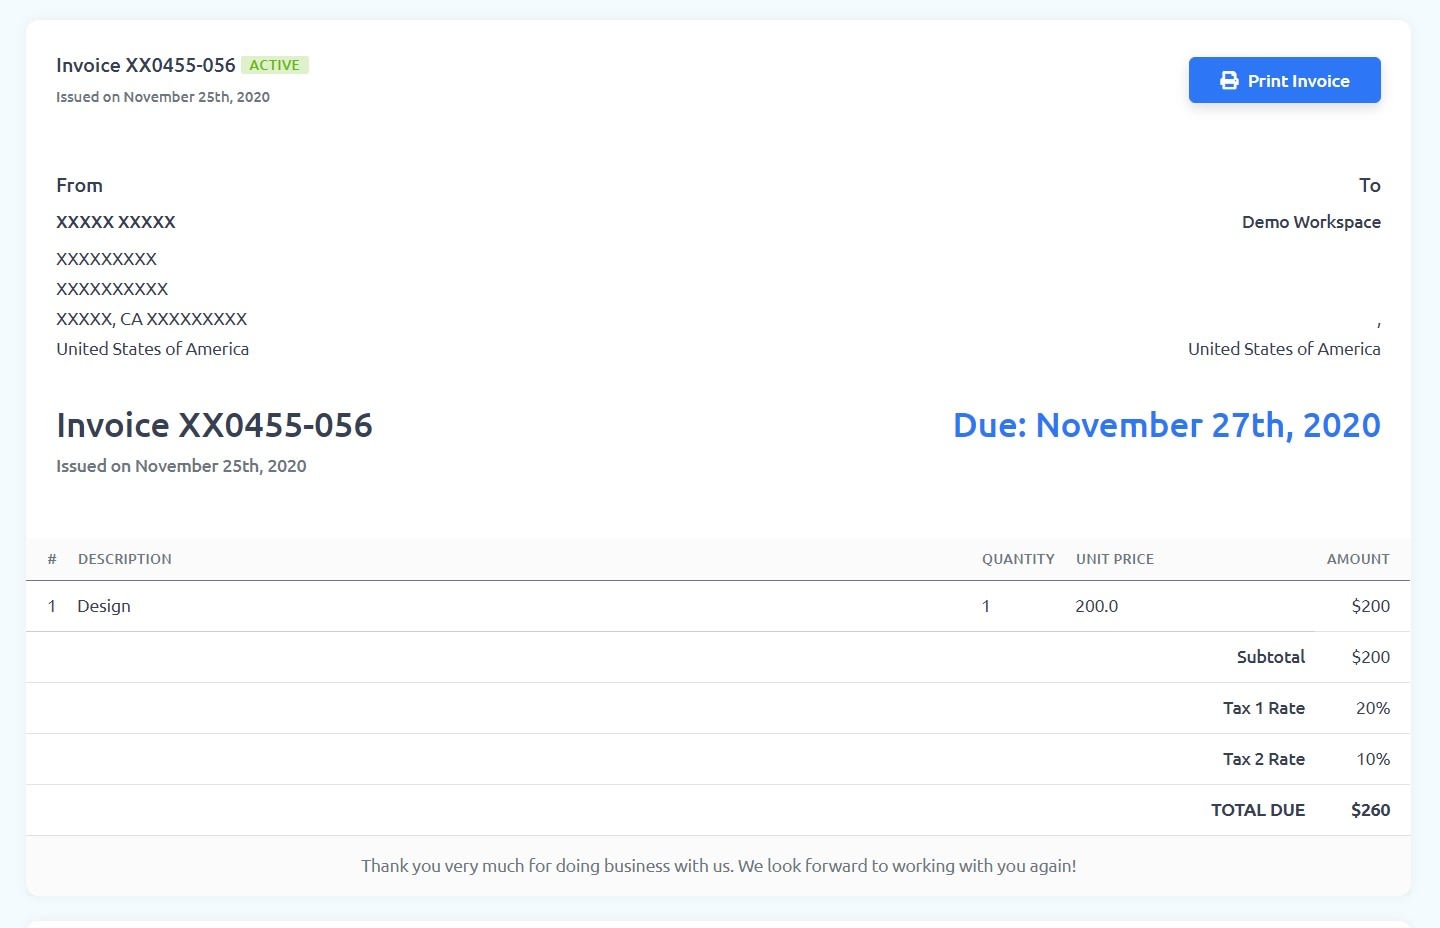
Step 3: That is all! If you wish, you can print the invoice you created by clicking the Print Invoice button.
Step 1: Make sure your Invoice app is installed on your dashboard. Then, let your employees know that they are able to send an invoice!
This article will help you with the Invoice App setup.
How to Install the Invoice App

Step 2: You will be able to view sent invoice requests on your Invoices page. Once you have selected the invoice request you want to pay, click the Pay button.

Step 3: Select your payment method and then click the Save and Continue button.

Step 4: After confirming your payment, click the Submit button.

Step 5: That is all! You will see that your payment has been processed.

After clicking the Details button, you can see the Invoice Number and other details from the window that opens.

STEP 1: Click Invoices on your RemoteTeam dashboard. Then click on the section where your invoice is located.

STEP 2: Click the View button of the Invoice that you would need to print or download.

STEP 3: Click the Print Invoice button.

STEP 4: You should have the option to either print or save it as PDF.

STEP 1: Click on People on your RemoteTeam dashboard.
STEP 2: Click the Details button of the team member that you would like to check.

STEP 3: Click on Invoices.
That should show the team member’s invoices history.

With the recent update to our Invoice App, you can now create Invoices for your Independent Contractors, Vendors, and Clients. You can now directly invite and/or pay anyone you work with through the RemoteTeam dashboard and create both incoming and outgoing Invoices.
Create Invoices For Your Independent Contractors and Freelancers
Before, only employees could create invoices and send to company admins for payment. In our new update, admins can create an invoice for them using Incoming Invoices.
STEP 1: Go to Invoices > Incoming Invoices > click on New Incoming Invoice button > select Contractors > click Next button.

STEP 2: If you need to send an Invoice to an existing Contractor, click on the Select Contractor dropdown. If you need to add a Contractor, click the New Contractor button to add them. Doing so, you will be able to invite the new Contractor to RemoteTeam.

Follow the prompts to finish creating the invoice. More detailed instructions will be posted in a separate article soon.
Create Invoices For Your Vendors
Now you will be able to create an invoice not only for your independent contractors, but also for your vendors.
STEP 1: Go to Invoices > Incoming Invoices > click on New Incoming Invoice button > select Vendors > click Next button.

STEP 2: If you need to send an Invoice to an existing Vendor, click on the Select Vendor dropdown. If you need to add a Vendor, click the New Vendor button to add them. Doing so, you will be able to invite the new Vendor to RemoteTeam.
Add a vendor in 2 ways: (1) If your vendor already has a RemoteTeam account, you can search their RemoteTeam ID and add them. (2) If your vendor does not have a RemoteTeam account, you can add their information manually.

STEP 3: Fill in your Vendor Info details – Business Name, Business Country, Contact Email and Contact Full Name. You also have an option to invite them to RemoteTeam by clicking Invite to RemoteTeam.

STEP 4: Fill in the Vendor Address part. If you know their address and bank account information you can add it, or skip and let the Vendor set it up later.

Follow the prompts to finish creating the invoice. More detailed instructions will be posted in a separate article soon.
Create Outgoing Invoices
The Outgoing Invoices feature follows the same process as Incoming Invoices. If you want to receive a payment from your client, you can create and send an invoice to them. If you haven’t added your client to your account yet, you can add new clients by clicking the New Client button.
Add a client in 2 ways: (1) If your client already has a RemoteTeam account, you can search their RemoteTeam ID and add them. (2) If your client does not have a RemoteTeam account, you can add their information manually.

After creating an Outgoing Invoice, it will be sent to your client and they can pay it through their account. You can also track the status of your invoice to see whether it has been paid or not.

Managing your Payment History
You can View, Track and Manage all your Payments on the Payments menu.

Managing your Vendors
Use the Vendors menu to add new vendors, complete any missing vendor information, and easily manage your vendors.

Managing your Clients
You can add or edit existing clients on the Clients menu.

** A more detailed article(s) for each of the Invoices menu will be posted soon. **
One last thing! We’ve gotten some questions about the most effective way to use our Invoice App, Payroll App, and Reimbursement App together. Here are two breakdowns of how they can be used together to manage your business payments seamlessly.